Showing posts with label easter. Show all posts

Saturday, May 5, 2012

Flower of the Week

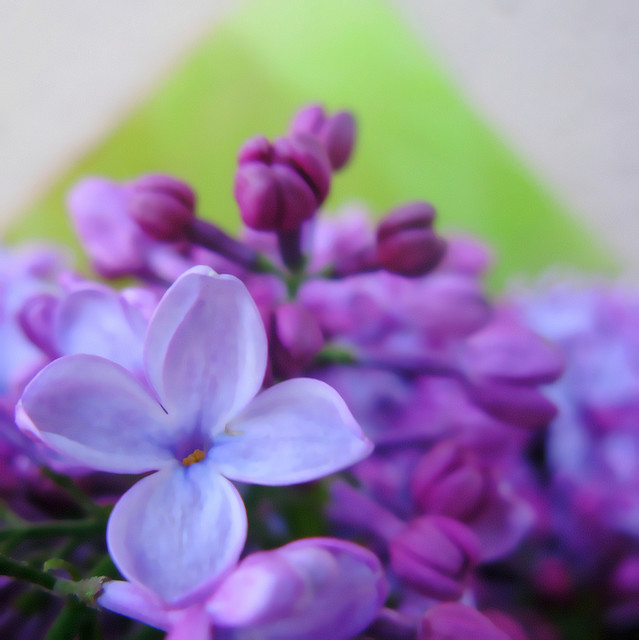
Lilac
Syringa vulgaris


According to Greek mythology, Syringa was a beautiful nymph who captivated Pan, the god of the forests and fields. Pan chased Syringa through his domain until, finally, Syringa was exhausted and could only escape by turning herself into a plant - the fragrant flower we know now as lilac.

Lilac's meanings of first love and youthful innocence arise from its flowering time being a harbinger of spring. Purple-flowering lilacs convey the first emotion sof love, whereas white or pink flowering lilacs are associated with youthful innocence.  In Russian folklore, cradling a newborn beneath a lilac bush would bring the child wisdom. In parts of the Mediterranean, lilac is closely associated with the festival of Easter because it so often blooms around that time. Lilac is also the flower for eighth wedding anniversaries. *


*Excerpt from The Secret Language of Flowers by Samantha Grey

Thursday, April 5, 2012

Martha Stewart's Coconut Cake


This is one of Elizabeth's favorite Easter dessert recipes from everyone's favorite lifestyle guru. To make sure it was as good as our fearless leader claims, we made a mini 6-inch version and snacked on it all day in the shop today (we do these things out of love for our readers, obviously). The coconut flavor is light but present, and the whipped Seven Minute Icing is a wonderful choice for those of us who tend to eat in between piles of buttercream and leave cake-slice-shaped layers of frosting on our plates. The only change we made was to add un-toasted coconut flakes to the outside, rather than a layer of toasted coconut. 

Recipe after the jump!

Wednesday, April 4, 2012

Elizabeth's Expert Advice: DIY Easter Grass


DIY-minded readers, it is your lucky day! Today's double Expert Advice posts go hand-in-hand - first we learned how to blow out eggs and dye the shells. Next up is how to dye your own Easter grass, if you're not particularly fond of the shiny plastic stuff that never. goes. away. once you release it from its packaging. And who IS fond of that stuff, anyway? For an easy alternative, read on!


1. This is another very simple project - you'll need paint, water, a large plastic bucket or similar container, and a neutral colored grass. We picked up this craft grass at Hobby Lobby, but there's an infinite number of materials you could use - go to town! 

2. Mix your blues and yellows until you reach your desired green. We tried going using green paint, but couldn't find the exact spring-y color we were aiming for. Any water mixable paint will work, so use whatever you have on hand! 

3. Once you've got the correct hue ready to go, mix in a little water. You don't need much - you'll notice here that we used just enough to fill a section of this palette. 

4. Pour the water/paint mixture into your bucket o' grass and mix it up! You can continue adding paint and water until your grass is saturated, or just toss it together lightly for a pretty pastel. 

5. Remove the grass and lay out on newspaper to dry for several hours before using. 


What do you guys think? Prettier than the plastic stuff, right?

Elizabeth's Expert Advice: Dying Egg Shells for Easter

Easter is almost here! This means it's time for family dinners, biting the ears off chocolate bunnies (and feeling a little guilty about it), and hunting for Easter eggs - which means you'll love this week's advice on blowing out the insides of eggs and dying them, leaving only a pretty shell to hide amongst your knick knacks. A shell that, if left undiscovered or forgotten, will continue to stay pretty and not a rotting egg mess. Sound good? We think so. 


1. Your supply list is simple: Eggs (make sure they're white), pins or needles, water and containers, and your dye of choice. Here we used Kool-Aid instead of fooling with food coloring or boxes of dye, but the choice is yours. Kool-Aid is simpler than many dyes in that it only requires water - no vinegar. 

2. Using a strong pin or needle, poke a small hole in the top of the egg (the smaller end). The hole should be several millimeters across, but no more.

3. Flip the egg over and on the bottom, poke another, larger hole. This is where the white and yolk will come out, so make sure you give them enough room - perhaps a centimeter or so. Treat your egg very carefully as it's easy to crack or even completely smash the shell during this step. 

4. Holding the egg over a bowl with the smaller hole on top, gently blow into it! Once the whites start to emerge you can just shake the egg until empty. 

5. Carefully, but thoroughly, wash and rinse the shells of any whites or yolk.


6. Mix your dyes! If you're using Kool-Aid, assemble your containers and pour each packet into a different one. Add a cup of water to each container, give or take. Less water will result in more vibrant eggs, more will give you soft pastels. 

7. Drop your egg in! You'll notice that it floats on top because it's hollow - just push it down into the water with a spoon until it fills up and stays put. 

8. Allow your egg to soak, varying times according to desired color saturation. This bright persimmon-colored egg soaked for about a minute. 

9. Pull the egg out with a spoon and let the dye drain out of the bottom.

10. Lay it down to rest and dry, handling it as little as possible until the dye sets. It helps to place a cloth or paper towel under your egg carton, since any remaining water in the egg will drip down. 

11. Let the hiding and hunting begin! 


Happy Wednesday, everyone! 


Related Posts Plugin for WordPress, Blogger...